
To paint feathers on birds, start by understanding the basics. Feathers have unique textures and patterns.
Knowing how to capture this will make your bird paintings come to life. Painting feathers on birds can seem challenging. But with the right techniques, it becomes easier and enjoyable. This guide will help you explore the process step-by-step. You will learn about the tools you need and the methods to paint realistic feathers.
Whether you are a beginner or have some experience, these tips will enhance your skills. Get ready to bring your bird paintings to life with beautifully detailed feathers. Let’s dive into the fascinating world of painting feathers on birds!
Materials Needed
To paint feathers on birds, you need specific materials. These tools will help you achieve realistic and beautiful results. Let’s explore the essential supplies and recommended brands that can make your bird paintings come to life.
Essential Supplies
Gather a set of good quality brushes. These include fine detail brushes, flat brushes, and round brushes. You will also need a palette for mixing colors. Choose a sturdy canvas or watercolor paper based on your medium.
Colors are crucial for painting feathers. Get a variety of paints, including primary colors and earth tones. A mixing medium or water will help you achieve different textures and effects. Having a reference image of the bird can guide you. Don’t forget a pencil for sketching and an eraser for corrections.
Recommended Brands
For brushes, consider brands like Winsor & Newton, Princeton, and Da Vinci. These brands offer quality and durability. For paints, look at Winsor & Newton, Daniel Smith, and Holbein. These brands are known for their vivid colors and smooth application.
When choosing paper or canvas, brands like Arches and Strathmore are reliable. They provide excellent surfaces for both watercolor and acrylic paints. For palettes, consider the ones from Masterson or Mijello. They offer good space and durability for mixing paints.
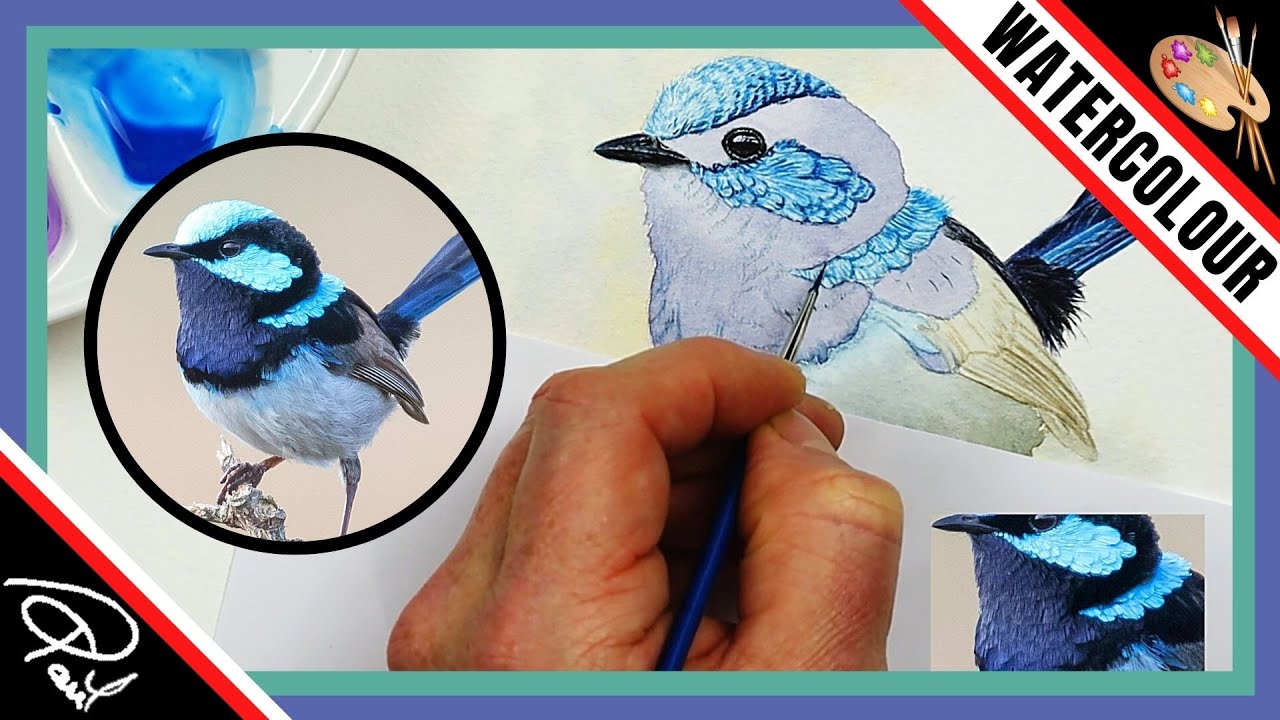
Credit: www.youtube.com
Choosing The Right Bird
Selecting the right bird for painting feathers is crucial. Consider the species, feather patterns, and colors to achieve realism. Focus on details for a lifelike representation.
Choosing the right bird to paint is a crucial step. Your choice impacts the overall look and feel of the artwork. Consider the bird’s size, color, and feather patterns. Some birds have intricate designs, while others are more straightforward. Pick a bird that matches your skill level.Popular Bird Species
Some birds are more popular for painting than others. The cardinal is a favorite due to its striking red feathers. Blue jays offer vibrant blues and intricate patterns. Owls have unique feather textures and captivating eyes. Hummingbirds are small but colorful, perfect for detailed work. Each bird offers different challenges and rewards.Reference Images
Using reference images is essential for accuracy. Find high-quality photos of your chosen bird. Look for different angles and close-ups of feathers. Notice the color variations and patterns. Reference images help capture the bird’s true essence. Use online resources or nature photography books. These can provide valuable insights into feather details.Setting Up Your Workspace
Setting up your workspace is crucial for painting feathers on birds. A well-organized area helps you focus and enhances your creativity. Here are some tips to create the perfect painting environment.
Lighting
Good lighting is essential for detailed work. Natural light is ideal but use a bright lamp if needed. Position the light to reduce shadows. This makes it easier to see fine details.
Organization Tips
Keep your brushes, paints, and other tools within reach. Use containers to sort different supplies. This saves time and keeps the workspace tidy. A clean area boosts your mood and productivity. Arrange your materials logically. Consider having a separate space for mixing colors. Label containers for easy identification.
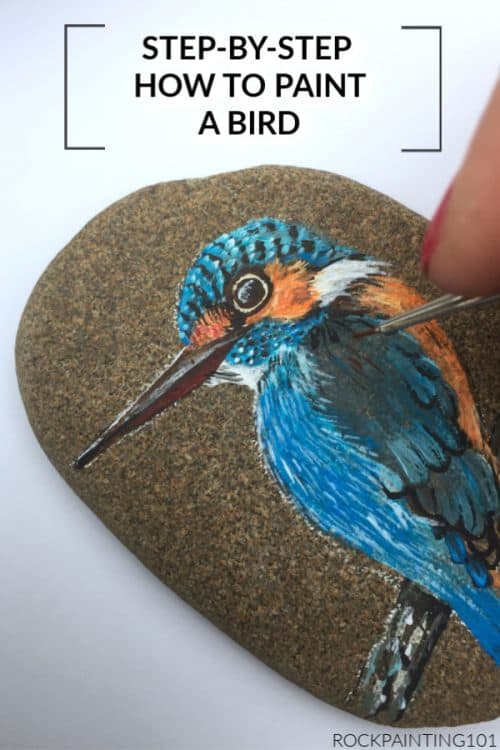
Credit: rockpainting101.com
Sketching The Bird
Painting bird feathers involves delicate strokes and attention to detail. Layering colors can create realistic textures. Use fine brushes for precision.
Sketching the Bird Before you can paint feathers on birds, you’ll need to start with a strong foundation: the sketch. Sketching the bird sets the stage for the detailed work to follow. Let’s break down the process into manageable steps, ensuring your bird looks realistic and lifelike.Basic Shapes
Begin with basic shapes. This is your skeleton. Use circles and ovals to map out the bird’s body. For example, a small circle for the head, a larger oval for the body, and simple lines to indicate the tail and legs. Don’t worry about perfection. These shapes are just guidelines.Adding Details
Now, refine your sketch. Add more detail to your basic shapes. Define the beak and eyes. These features give the bird its character. Sketch the wings and tail feathers. Use quick, light strokes to get a feel for their placement. Focus on the overall form. Ensure the bird looks balanced and natural. When I first started, my sketches were too rigid. But with practice, I learned to keep my lines loose and fluid. Are you struggling with proportions? Step back and view your sketch from a distance. It helps to see the overall composition. Remember, sketching is an iterative process. Don’t be afraid to erase and adjust. Every artist does it. By laying a solid foundation with your sketch, you pave the way for a successful painting. What challenges do you face when sketching birds? Share your thoughts in the comments below.Painting The Base Layer
Painting the base layer is the first step to creating beautiful bird feathers. This layer sets the stage for the colors and details that follow. It provides a foundation for the feather’s texture and depth. Let’s explore how to choose colors and apply the first coat.
Choosing Colors
Select colors that match the bird you’re painting. Research the bird’s natural colors. Observe the shades and tones in its feathers. Use a mix of light and dark shades. This gives the feathers a realistic look. Remember, the base layer should be lighter. This allows the following layers to stand out.
Applying The First Coat
Start with a thin coat of paint. Use a soft brush for smooth application. Cover the entire feather area evenly. Ensure there are no thick spots or gaps. Let the first coat dry completely. This prevents smudging and ensures a solid base. Repeat if necessary for better coverage. This completes the base layer and prepares the feathers for detail.
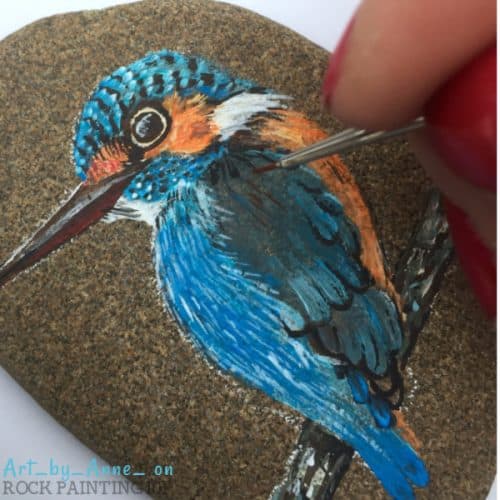
Credit: rockpainting101.com
Adding Feather Details
Adding feather details to your bird paintings can bring them to life. Feathers give birds their unique look and texture. It’s essential to capture these details to create a realistic depiction. With a few techniques, you can enhance your bird paintings and make them look stunning.
Layering Techniques
Start by layering your colors. Use lighter shades as the base. Gradually add darker hues. This helps create depth and dimension. Work from the back of the bird to the front. This ensures each layer of feathers stands out. Paint individual feathers with small, precise strokes.
Don’t rush the process. Allow each layer to dry before adding the next. This prevents colors from blending too much. Use fine brushes for detailed work. They help achieve a realistic feather look. Experiment with different brush types and sizes. This can give varied feather textures.
Creating Texture
Creating texture is key to realistic feathers. Use dry brushing techniques. This involves using a dry brush with minimal paint. Lightly drag the brush over the surface. This adds a soft, feathery texture. Combine with layering for best results.
You can also use stippling. Tap the brush lightly on the canvas. This creates small, dotted textures. It mimics the look of fluffy feathers. Add fine lines for detailed feathers. Use a sharp, pointed brush. These lines represent the individual strands of each feather.
Don’t forget to observe real feathers. Study photos or real birds. Notice the patterns and textures. Try to replicate these in your painting. Practice makes perfect. The more you paint feathers, the better you’ll get.
Enhancing With Highlights And Shadows
Enhancing feathers on birds with highlights and shadows brings them to life. This technique adds depth and realism to your artwork. Properly placed highlights and shadows make feathers look more three-dimensional.
Highlight Placement
Highlights should be added where the light hits the feathers. Observe your reference image carefully. Look for areas that catch the light the most. Usually, the tips and edges of feathers are the brightest. Use a light color to paint these areas. Be subtle with your strokes to keep the highlights natural.
Shadow Techniques
Shadows add depth and contrast to feathers. Look for areas where the feathers overlap. These spots usually have darker shadows. Use a darker shade to paint these areas. Blend the shadows smoothly into the surrounding feathers. This creates a soft transition and makes the feathers look realistic.
Pay attention to the direction of light. Shadows should be consistent with the light source. Study your reference image to understand the shadow patterns. Use small, gentle strokes to add shadows without making them too harsh.
Final Touches
Adding final touches to painted feathers on birds makes them look more realistic and detailed. Use fine brushes for intricate lines and subtle shading. This enhances the feather’s texture and natural appearance.
Painting feathers on birds can be a meticulous yet rewarding process. As you approach the final touches, it’s crucial to focus on refining your artwork. These last steps can make your painting stand out and look more realistic. Here’s how you can perfect your feather painting with attention to detail.Blending Edges
To make your feathers look natural, blending the edges is essential. Use a soft brush to gently blur the boundaries where the feathers meet. This technique helps create a seamless transition between different parts of the bird. Apply light, feathery strokes. This ensures the colors mix subtly. If the edges are too sharp, the feathers may appear stiff and unrealistic. Consider using a dry brush technique. Dip your brush in paint, then wipe off the excess. Gently blend the colors where needed. This adds a soft, natural effect to your feathers.Sealing Your Work
Once you’re satisfied with your painting, sealing your work is the next important step. This protects your artwork from dust, moisture, and fading. Choose a clear varnish or fixative spray. Apply it evenly over your painting. Ensure the area is well-ventilated and follow the manufacturer’s instructions. Allow your painting to dry completely. This usually takes a few hours. Once dry, your artwork will have a protective layer that keeps it looking vibrant and fresh. Have you ever skipped sealing your work and regretted it later? Sealing might feel like an extra step, but it significantly enhances the longevity of your art. Remember, the final touches are what breathe life into your painting. Take your time with these steps to ensure your feathers look as realistic as possible. What techniques have you found most effective in your feather painting journey?Frequently Asked Questions
What Kind Of Paint Do You Use To Paint Feathers?
Use acrylic paint to paint feathers. It adheres well and dries quickly. Avoid oil-based paints as they can be too heavy.
How To Paint Feathers On A Bird With Acrylic Paint?
Begin with a light base color. Add layers for depth, using thin strokes. Use a small brush for details. Blend colors for realism. Allow each layer to dry.
How To Paint Feathers Without Ruining Them?
Use a soft brush and light strokes to paint feathers gently. Apply thin layers of non-toxic paint. Allow each layer to dry completely. Avoid overloading the brush with paint. Handle feathers delicately to prevent damage.
What Brush Is Best For Painting Feathers?
A small, pointed round brush or a fine liner brush works best for painting feathers. They allow for detailed strokes.
Conclusion
Painting feathers on birds can be fun and rewarding. Practice patience and observe real feathers. Use light strokes and blend colors gently. Focus on detail, but enjoy the process. With time, your skills will improve. Soon, you’ll create lifelike bird paintings.
Keep experimenting and learning. Happy painting!